
MAKE YOUR OWN MIMOSA BOARD
You asked for it. So I’m showing you how I created my Mimosa Board. I’m a huge fan of mimosa bars at events. And since we’re stuck at home, I used that as inspiration to create this for a brunch date at home. As with most things on my blog, feel free to use my instructions as a guideline. But I definitely encourage you to add your own flair and incorporate your favorite alcohol and fruits to make something that you’re excited to show off to your girls, hubby, or whoever!
WHAT YOU’LL NEED
A bunch of your favorite fruit. Try to mix up the colors if you can but any fruit will do.
I used blackberries, strawberries, limes, oranges, lemons, blueberries, and raspberries.
Fresh herbs
They help fill any small, empty spaces and add some nice greenery to the tray. Think mint, rosemary, parsley, etc.
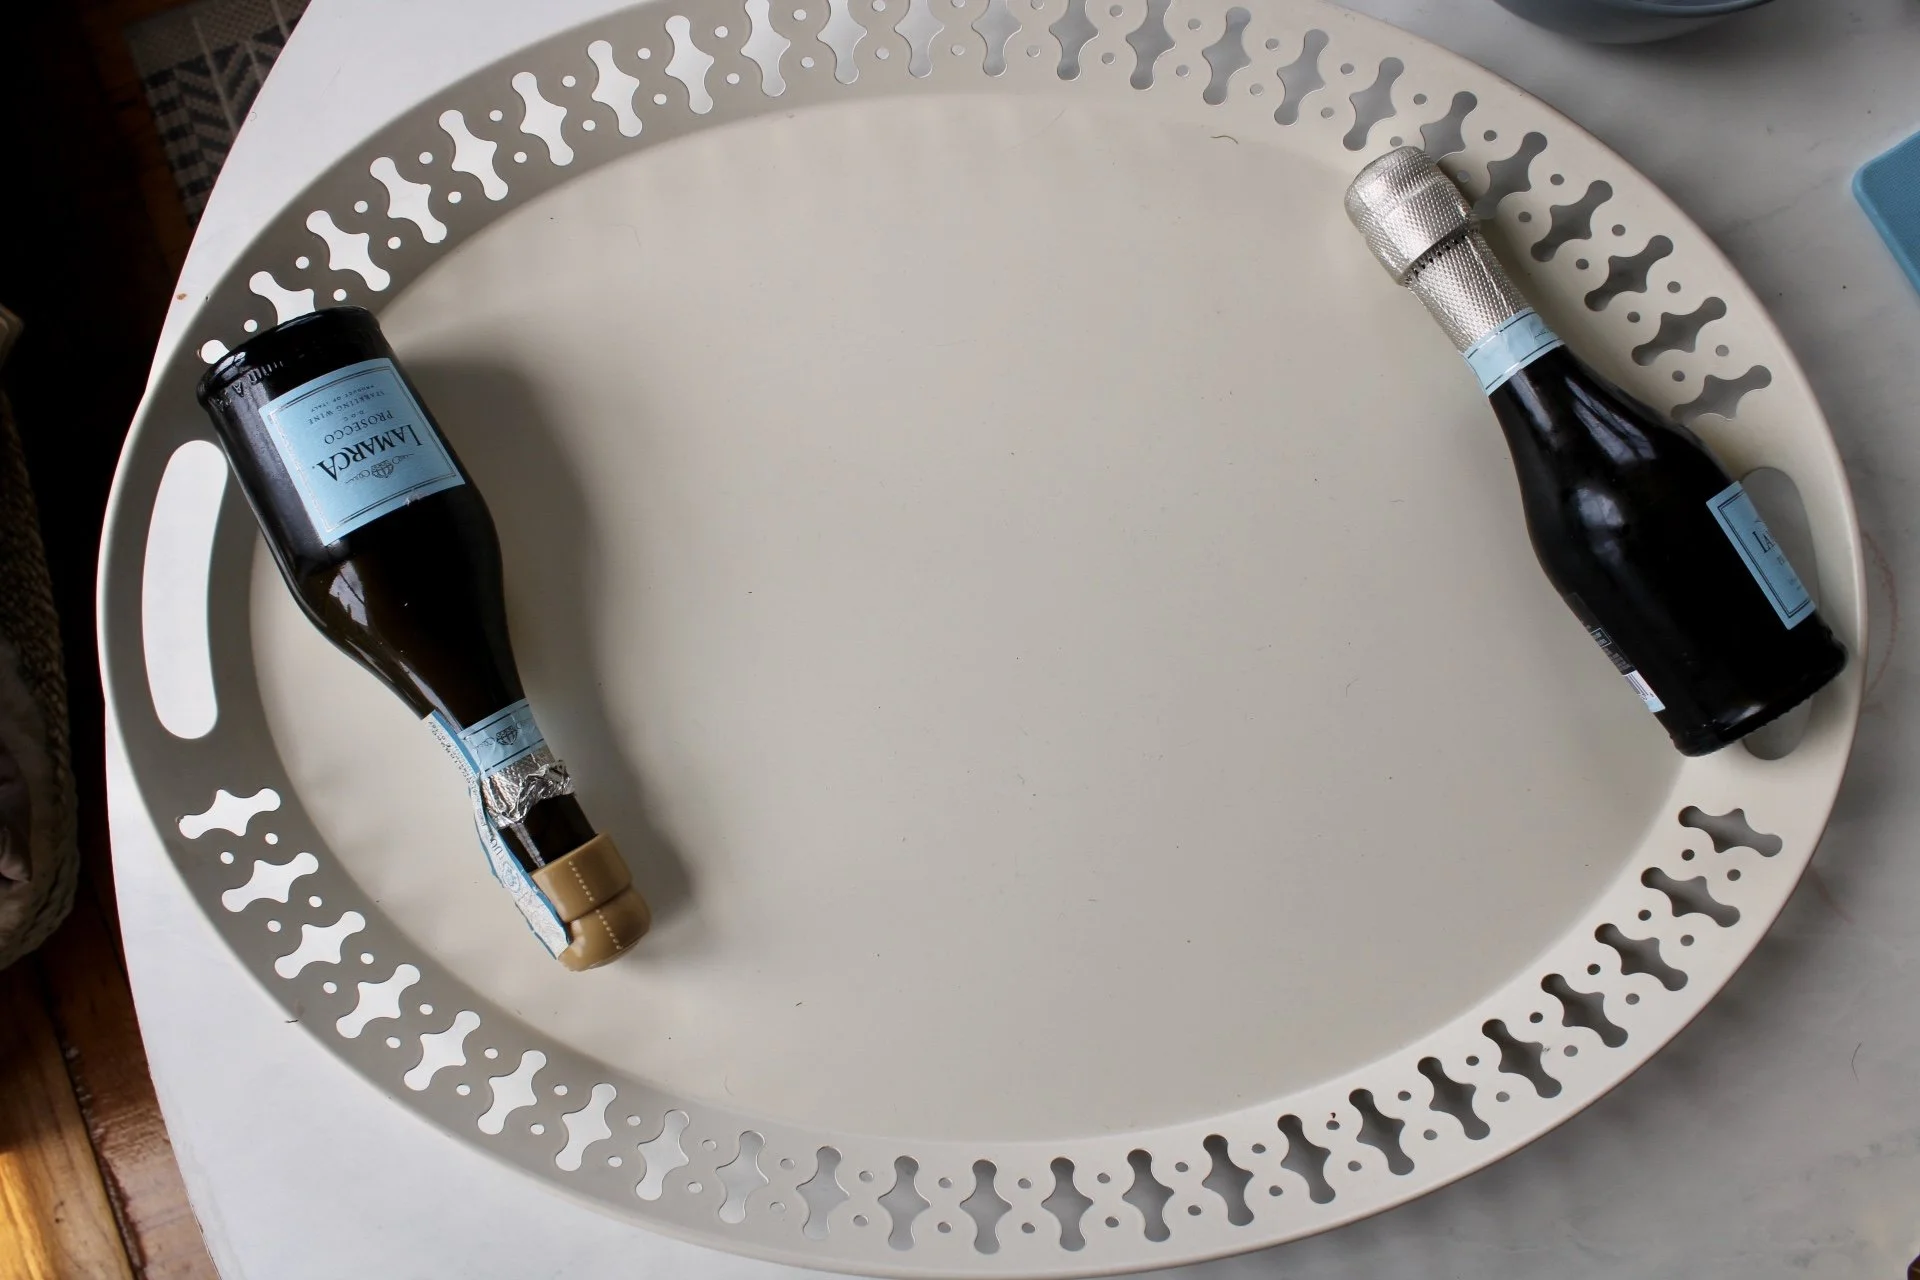
A tray
Whatever you have at home will work. I used the ROMANTISK tray from Ikea.
2 Mini Prosecco bottles
I used some LaMarca minis I found at my local liquor store for $5. Nips would also work well here.
2 mini carafes with juice/nectar for your mimosa
I got mine at the Webstaurant Store
PREP YOUR FRUIT
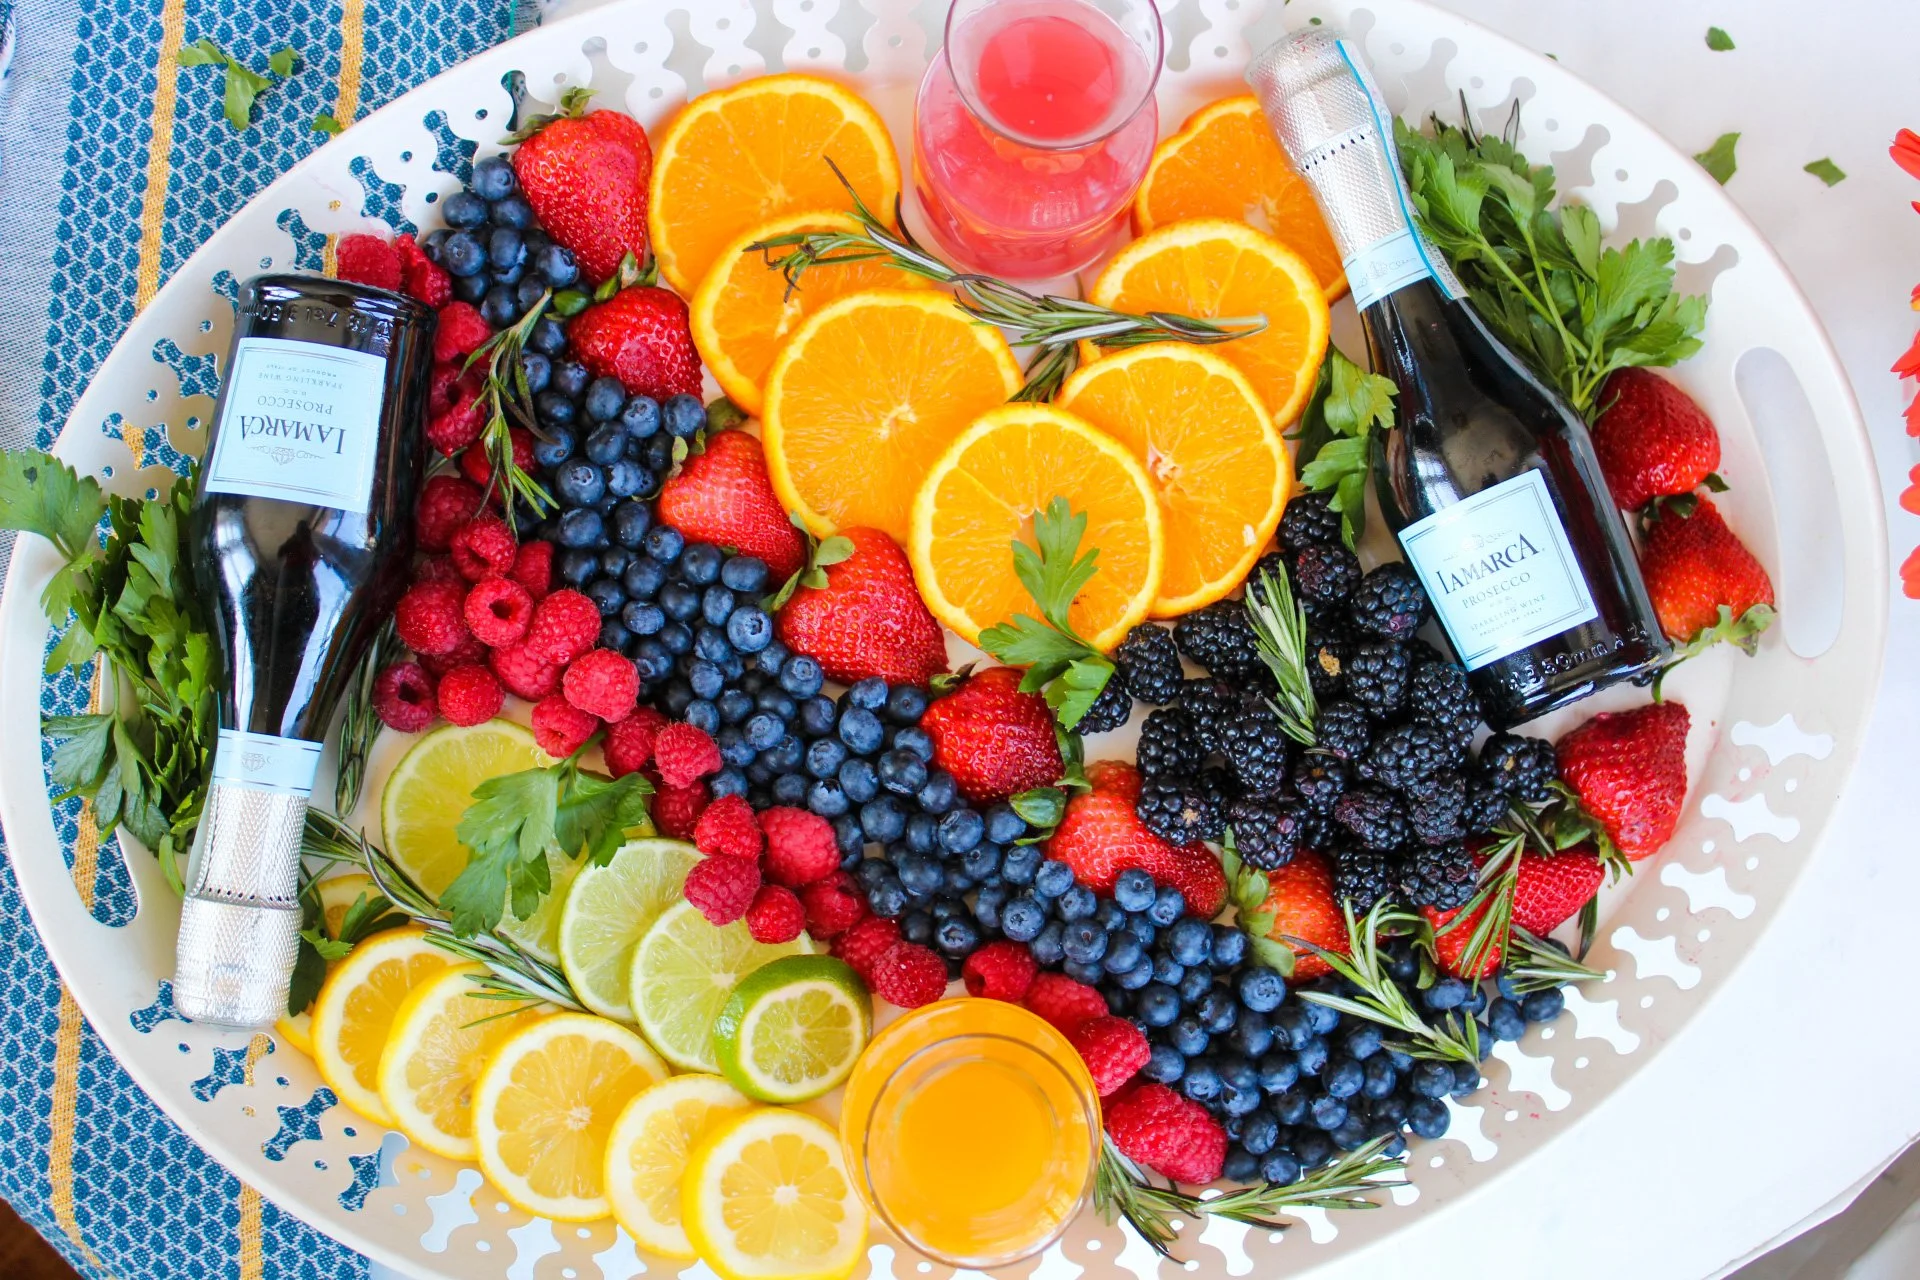
First things first, make sure your fruit is washed and dried. The amount of fruit you use really depends on how much space you have to work with on your tray. I used blackberries, raspberries, blueberries, strawberries, lemons, limes, and oranges. I sliced the lemons, limes, and oranges about a 1/4 of an inch thick. I also cut the strawberries in half lengthwise so they would stay put on the tray and not roll around. I also left the leafy top on to add some color to the tray.
2. SELECT YOUR TRAY
Honestly, use what you have at home. The tray I used is one I got from Ikea a few years ago. I liked this one because of the raised edge. It kept the fruit from sliding off when I was taking pictures. But any shape or size works.
3. FILL YOUR TRAY!
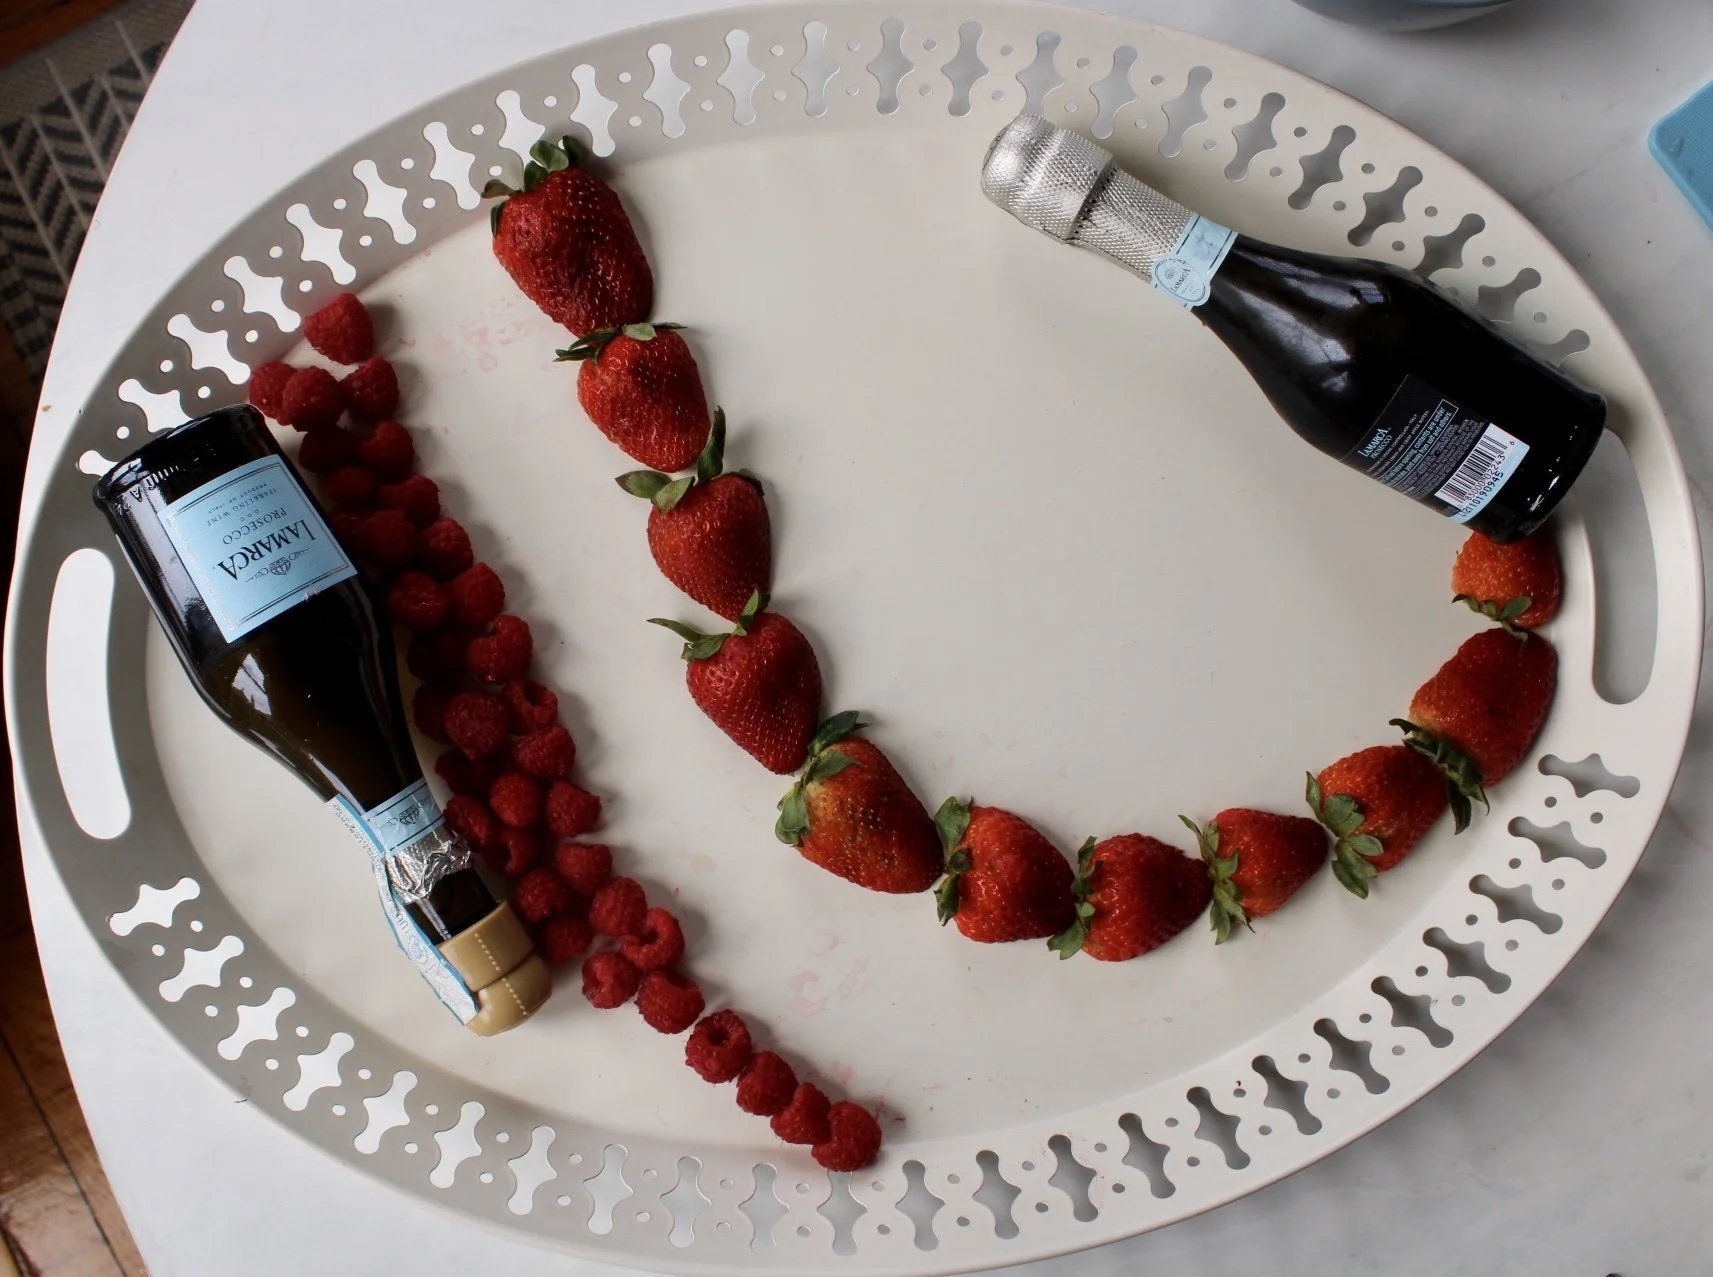
I started with the alcohol bottles first since they were the largest items. I just laid them down on opposite ends of the tray…cuz ya’ll love a flatllay lol. From there, I added my strawberries. I really love Marisa from That Cheese Plate’s creations and was inspired by the salami rivers she makes on her cheeseboards. If you haven’t seen them, check out her Instagram. So I used the same concept when placing my strawberries.
Next, I added the raspberries. I left space between the raspberries and the strawberries because I wanted to add a fruit that was not red to create some contrast. In this case, I was leaving space for the blueberries. I lined up the raspberries and made sure they were all touching so there was no white space between each berry. I made sure to follow the same curves as the strawberries so they would appear parallel to each other.

Once I finished with the raspberries, I added the blueberries in between the raspberries and the strawberries. The blueberries are tiny and roll everywhere so the strawberries and raspberries created the perfect boundary. I really laid on the blueberries because I had a lot to work with. But again, use what you have.
Once my strawberries, raspberries, and blueberries were on the tray, I added to 2 mini carafes of mango nectar and pink lemonade. Those would serve as the juice to add to the champagne.
From there, I kinda just freestyled the rest. I took the sliced oranges and placed them in a V-shape around one mini carafe. Then, I took the sliced lemons and added them in the bottom left corner where I could find space. Then, I added the blackberries in a pile next to one of my mini Prosecco bottles.
Lastly, I added pieces of chopped fresh parsley and rosemary wherever I saw white space.
That’s pretty much it. It’s super easy to make your own mimosa board using what you have at home. Let me know how yours turns out!
